Ampex 600 / 601 / dual mono preamp
(I no longer make this 2 tube per channel design. The 2 tube design is now an option on a 3 tube preamp. See 2T/3T option.)
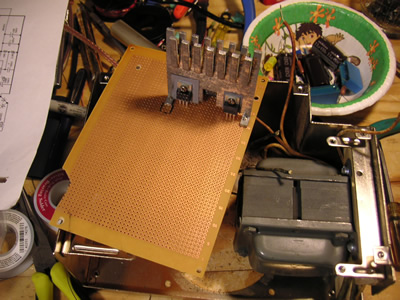
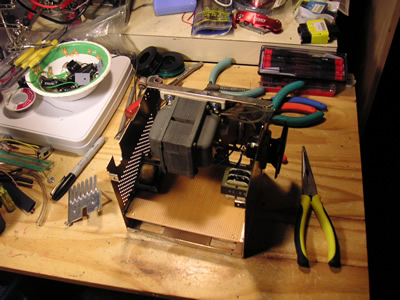
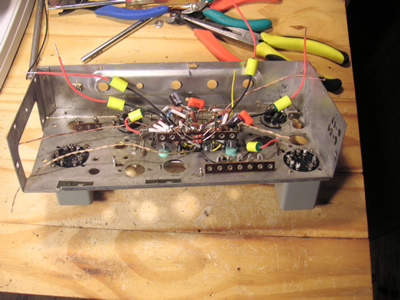
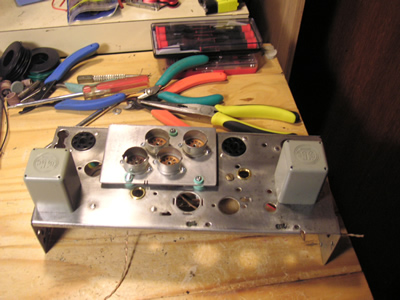
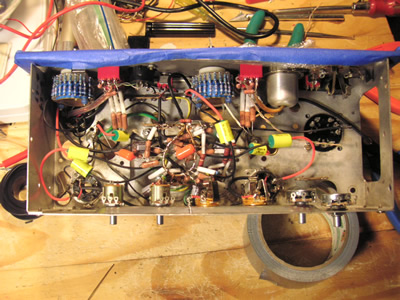
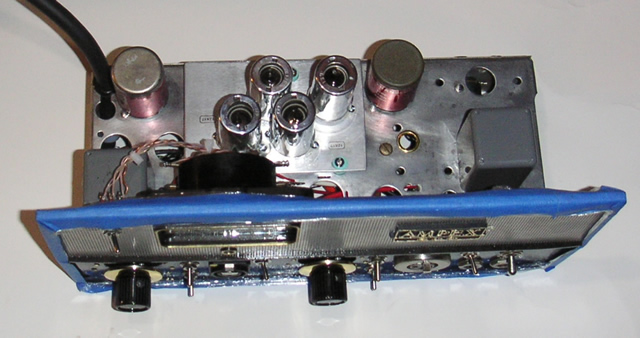
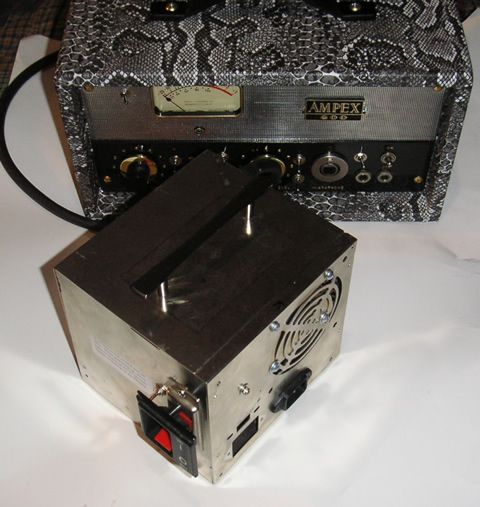
The unit below is a real mongrel. A combination of an Ampex 600 and a 601, with some Altec for good measure. The chassis is a 600, the input transformers are UTC A-11's as found on factory upgraded 600 decks. The circuitry and tubes are from the 601 (EF86 circuitry) and the output transformers are Altec 15095's. This is a dual mono unit which features Auricaps, stepped attenuators, remote power supply with DC filament power, 48V phantom power, output attenuation, EF806s tubes, 20 dB mic pad, floating tube platform, etc.
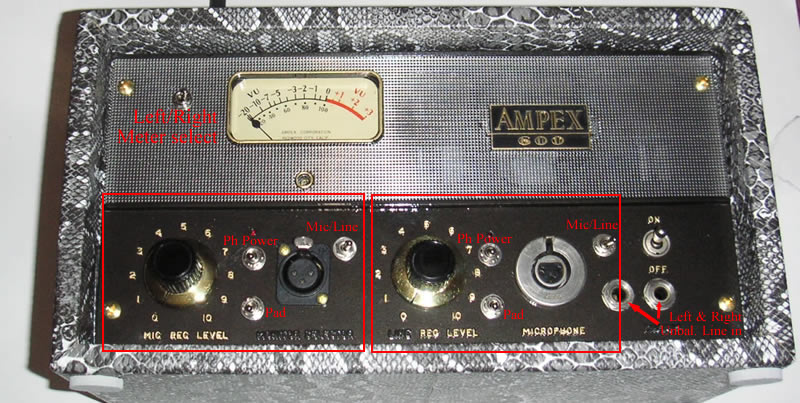
The 2 channels are laid out the same. The Mic/Line switches flip to the right for line and to the left for Mic. (Point to the input you want.)
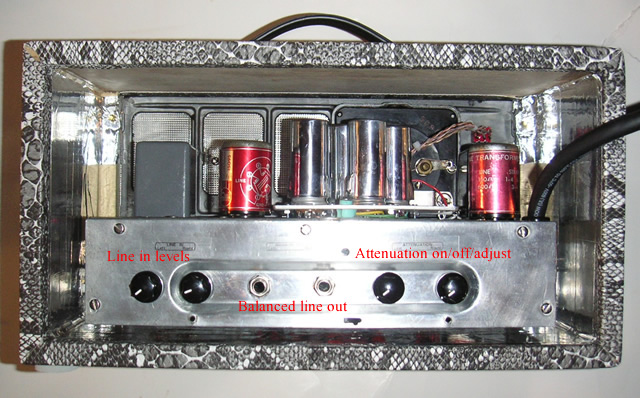
Line inputs: For instrument level (elec guitar) 80 - 100% works well. The outputs are balanced TRS and will accept unbalanced connections (1/4" TS) also.
The attenuation is mostly for use with guitars and basses. It allows one to drive the tubes harder without overdriving the input to an audio card, for example. I have found this to yield a great sound when you warm up the guitar just a little with the preamp, then run it through an amp simulator plug-in. I was amazed by how much better it made the simulator sound. It gets an excellent crunch with just the preamp, too.
Typical uses for this Preamp:
A) As a microphone preamp: This preamp can be used with a wide variety of mics. The input impedance is set at 200 Ohms. This is great for most dynamic and condenser microphones. Many modern condenser mics will overdrive the input of the preamp, especially with loud sources. That is what the mic pad is for. A natural example for me is my sax recordings where the pad is required for close mic'ing without distortion.
After hooking up the preamp outputs to your system:
1)
Plug in your mic
2) Flip the correct mic/line switch to the left
3) Turn on phantom power if needed
4) Turn off the mic pad
5) Set the meter switch to the appropriate side and bring up the level
Tech notes:
The inputs are wired with the modern standard of "pin 2 hot."
Use with a low Z ribbon microphone (~50 ohm) calls for changing the input transformer wiring.
The phantom power should only be turned on when it is needed.
Always turn the phantom power off before plugging or unplugging a microphone.
B) As an instrument DI preamp: This preamp sounds great when used with electric guitars and basses. I have found that amplifier VSTi's sound much better when you start with the signal coming from the preamp.
Let's start with a clean sound:
1) Plug in your guitar
2) Flip the proper mic/line switch to the right, and set the meter switch.
3) Turn the line in volume control on the back up to about 80%
4) Bring the main volume on the front up until the meter peaks at about 0.
From this point, try turning on the appropriate attenuation switch and experimenting with different combinations of level settings. Use the attenuator to keep the signal from overdriving your soundcard or whatever input it's plugged into. I usually turn the line-in all the way up and control the overdrive with the main volume on the front and the attenuation. The attenuation can also be used with a microphone if desired.
C) For stereo mixes and other tracks: This can be a little tricky because the line-in level controls are very touchy with strong input signals. Here is an example with a CD player to get you started, then experiment:
1) Plug the CD player into the line-in inputs on the front.
2) Set the mic/line switches to the right.
3)
Turn the line-in level controls all the way down.
4) Set the main level controls on the front to about 4.
5) Start the CD player, then gently turn up the line-in levels until you get peaks around -5 VU. Use care and get the levels the same on the left and right. For critical work like working on a master, one should use a mono test signal to set the 2 line-in level controls so they are exactly the same.
6) Now use the main level controls on the front to adjust how much over-drive you want to add to the sound. I find that with peaks at or below 0 VU, there is just a nice sheen on the highs and silky power in the lows. As the peaks go into the red you will start to hear tube distortion FX - salt to taste ;)
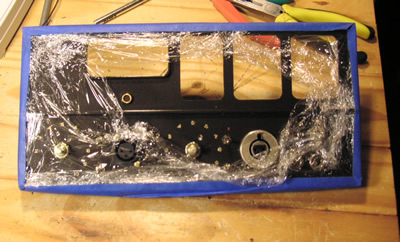
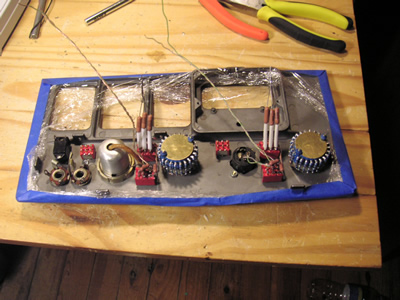
Here's some more pics from the build: